We build an advanced filter within the tool that will allow you not only to filter keywords by any dimension, but to bulk apply positions to these filtered keywords.
This feature will work both in Scenario 2 ( Existing Keywords) and Scenario 3 ( Competitor + Seed Keywords).
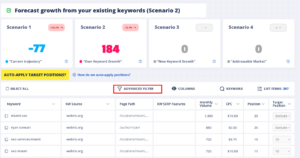
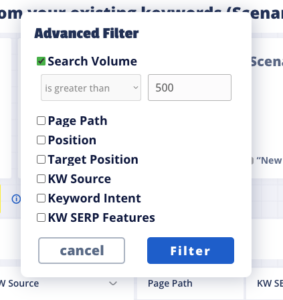
To filter you can use the Advanced Filter option in the options row above the keywords. When you click it, it will show you a list of dimensions you can filter by.

- Keyword Name
- Search Volume
- Page Path
- Position
- Target Position
- KW Source
- Keyword intent
- KW SERP Features
In each dimension the input varies from a number value (search value, position, target position), a text input (Keyword name, page path) or a dropdown based on fixed options ( KW Source, Keyword Intent and KW Serp Features). Each includes a series of logical conditions depending on the type of input.
Once you pick the option you want to filter by, and set the conditional accordingly, click on the filter button. In the example below, we picked to keep only keywords that have a search volume greater than 500.

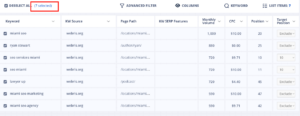
After clicking the button, no worries if it seems it didn’t work. The filter has been applied. You can verify by checking the number of list items, or by directly clicking the Select All option on the left side of the Advanced Filter – which is also the next step to be able to bulk-assign positions.
A small text in blue will appear confirming the number of keywords selected – click on it.

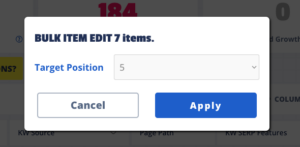
Once you do, a pop-window will show up that will allow you to pick a Target Position from the available options. Pick one accordingly and click on Apply. In the example below, we decided to bulk apply a target position of 5.

This feature also works with the Keyword Search function – to the right of the Columns option. Add directly the keyword text you want to filter by. Once you add the input, click on Search and it will filter by it. The rest of the steps are exactly the same.

And that’s it! Simple as that. You can repeat the process as many times as you need.
To change or cancel the existing filter, just click on the Advanced filter option and select Cancel – that will reset the filter.
You can filter by more than one dimension at once – just make sure to click on Filter after setting each of the options you want to use.
For an alternative, read our tutorial on using the Auto-Apply option.
Need more help?
- Check out our help section
- Email us support@trafficprojection.com